Wood & Wire: Art & Card Display
#DIY
Wood & Wire: Art & Card Display
I’m sure you love being blessed with artwork from your kid(s), invitations to weddings and parties, and the inevitable barrage of Christmas cards during the holiday season. They warm your heart! That being said, if you’re anything like me, watching them clutter the outside of your fridge or collect dust on your fireplace mantle gives you visual anxiety. I LOVE looking at the happy faces of my friends and family while they pose with their dog on the beach, but I’m still pre-maturely throwing their card away because it’s on eye-sore on my fridge. Okay, I’m a monster. Whatever.
Well, not this year! I am going to be locked and loaded, ready to proudly display every single invitation I receive this wedding season, every finger-painted princess, every backyard soiree announcement… you get the point. During my (what is becoming nightly) hunt for simple DIY projects, I stumbles across this *awesome* DIY Wood and Wire Art Display.
Not only is it cute as all get out, it allows you the ability to customize it with not only the things you decide to display, but also the color you choose stain the wood. Or hey, no one’s gonna stop you from painting that bad boy it if that’s more your style. Blues are SUPER on-trend. Maybe try painting them a deep/dark blue and using gold hardware for a more-chic take on the display.
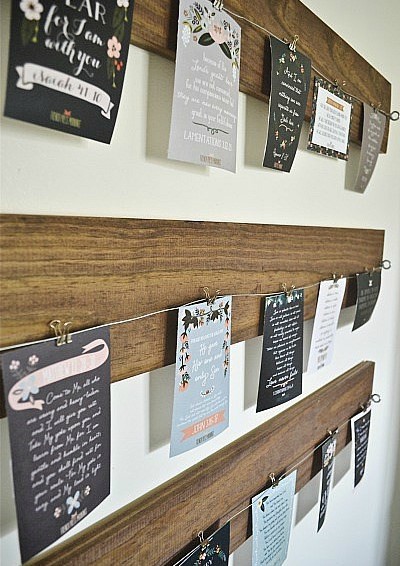
In the how-to guide I found online, the blogger decided to display sayings that motivate and inspire her. This is awesome for an office or even a child’s bedroom. Here’s a little #HACK – you can download and print pics right from your phone. Find pictures you like on your camera roll or save quotes/images from your Pinterest App. Then, go to the Walgreens App (download it if you don’t already heave it), upload the pics, select the location you want to pick them up at and just like that your photos are ready! The turn around time seems to only take a couple of hours and their prices are SUPER affordable. I do all of my photo printing this way.
To check out the original blog, please click the photo below to be redirected to her site/the site listed in the photo.

Let’s get started!
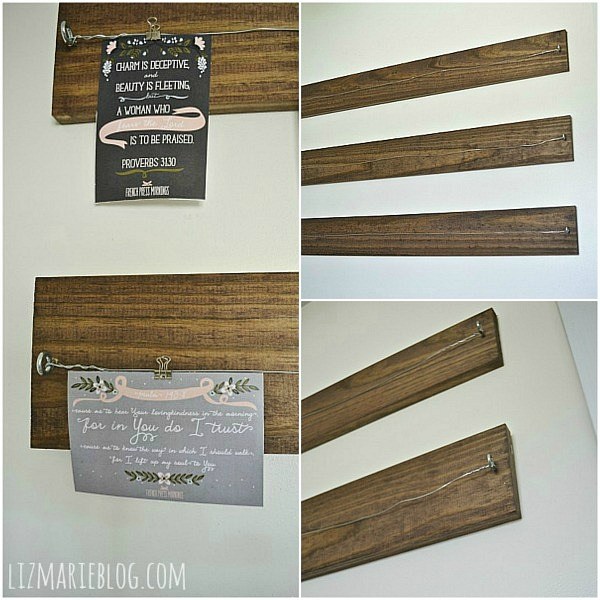
First you need the board. Run to your local Lowe’s or Home Depot and pick up one 12 ft board. The type of wood you choose is completely up to you. Either before you leave the store, or when you get home, cut the board into three even 4 ft pieces.
Now it’s time to stain. In the photos posted by the blogger, she used Special Walnut by Minwax, but again, whatever your decide on is completely up to you.
Next you need gauge wire and eyehole screws. Both of these items can be found in the picture hanging section at the hardware store. When the stain/paint dries, install an eyehole screw at the center/end of the board on each side, and twist the wire around each eyehook.
To hang the pictures, the blogger used clips she found in the art supply section at Walmart, but at the risk of sounding repetitive, you can use whatever your heart desires.
Finally, it’s time to hang your finished product! She used picture hanging hardware but noted that the boards are pretty light, and you could probably get away with using command stripes as to not damage your walls. Personally, I like the rustic look of the boards and might play into the motif by screwing right through the board and into the wall. Play with it and see which look you like best.
I. LOVE. THESE. What do you think?! Let us know in the comment section below, or leave a comment on our Instagram page!