
How to Press Flowers, Leaves and Herbs
Be sure to give thought as to how the flower will look when pressed. Avoid allowing overlapping parts unless desired artistically.
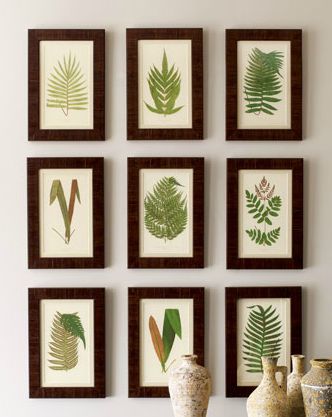
Leaves are normally laid out flat, while flowers can be split and opened up flat with their internal parts facing upwards.
For best results, pick flowers that are at their freshest, and begin to press them when there is no moisture on the surface. Press the flowers immediately to ensure the brightest and most vibrant colors.
Easiest Method: Flower Pressing in a Book
- Place a flower, leaf or herb between 2 pieces of paper then insert it between pages of a heavy book.
- Then, allow it to dry for a couple weeks.
- Alternatively, you can place the book in the microwave and zap it for 30 second intervals. Make sure to allow the pressed plant art to release steam and cool down before repeating the process.
Flower Press
- You can buy a flower press or make your own DIY wooden flower press.
- I personally prefer a flower press without metal. This allows for the opportunity to throw it in the microwave if desired.
- Below is a simple method to make your own DIY wooden flower press
DIY Wooden Flower Press
- Build you own wooden flower press using 2 flat pieces of wood board. Drill holes in the corners, and attach them together with a bolt and wing nut at each end of the wood boards
- Cut pieces of cardboard and paper to fit the size of the wood boards.
- Layer the pressed flower art accordingly: wood, cardboard, paper, flowers, paper, cardboard, wood. Then secure the DIY wooden flower press with the bolts and wing nuts.
- Drill a few holes in the wood boards to increase ventilation without compromising the support structure of the DIY wooden flower press.
Microwave Flower Press Method
- For quick and easy results, simply use your microwave to speed up the process. Use a book or metal free flower press with the pressed flower art inside.
- Zap for 1 minute at a time and allow the pressed flower art to release steam and cool in between. Repeat the process until the flower is almost dry.
- Avoid over cooking the flower or leaves because it will cause damage to the colors and pigments in your flowers.
- Furthermore, don’t over crowd the microwave by zapping too many flowers at the same time. Instead, zap one at a time and alternate between flowers to allow each one to cool properly.
- Once almost fully dried, insert the pressed flower art between the pages of a book or flower press to complete the drying process. This may take anywhere from a few hours to a day to finish properly.
- If you want to press a lot of flowers at the same time, the microwave may not be the most efficient method, but for a few sets it will work out just fine.