DIY On-Trend Shelving
#DIYThursday
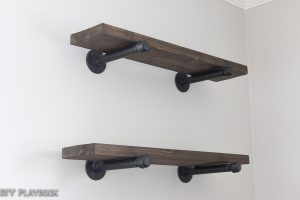
You Should Be Proud Of Your Shelf(s)!!!
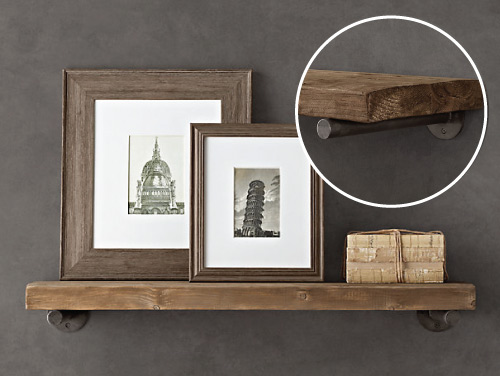
The inspiration for today’s #DIY comes from these BEAUTIFUL shelves Christy had installed in the Butler’s Pantry in one of our East Sac projects.

BRB, currently drooling over these. *Heart Eyes*
These shelves are originally a Restoration Hardware design, but more affordable versions have been taking over the internet – we found ours on Etsy! Although less expensive than those found at RH, these shelves do not fall under the “cheap” category. Even if you purchase them from an online vendor, like Wayfair or Houzz, it’s still going to set you back at least $65.00. Today’s project is not necessarily cheap by DIY standards but is a great way to add these stylish shelves to your décor without spending a fortune.
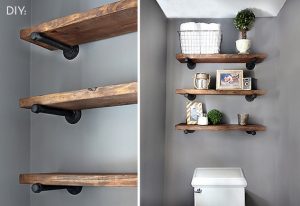
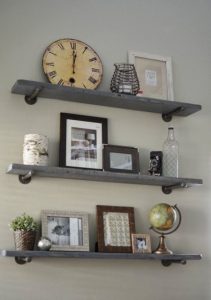
While scouring the internet for a more cost effective version of the shelving, I stumbled across this incredibly user-friendly step-by-step guide on The DIY Playbook. They even have their own GIF of the project! They built theirs as an accent in a rustic-inspired baby nursery. SO CUTE! I plan on installing the shelves in my kitchen, but they also go great in a bathroom or living room display.
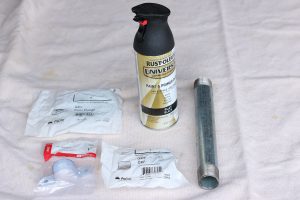
First things first… here’s what you’ll need:
PLEASE NOTE – This is a list of supplies for TWO shelves. Additionally, the links included in the supply list are for the specific brands/items the women of The DIY Playbook used.
- 4 pipescut to size (1 inch diameter)
- 4 caps(1 inch)
- 4 Galvanized Floor Flanges(1 inch) <– this is where most of the cost comes from (almost $10 each)
- Wood cut to two equal shelves
- Sandpaper
- Stain(color of your choice) + rags
- 1 bottleflat black spray paint
- 4 two hole straps(1 inch), may need 8 dark nuts + 8 dark washers to hold straps onto pipes
- Dark screws
- 16 wall anchors(if you don’t hit a stud)
Here’s a rough break down of the steps they explain on their blog. To check out their full post, click the first link on this page. ?
How To Create the Pipe Shelves
For the actual pipes, the only prep work is to pipe cut to size, which Lowe’s will do FOR FREE (!!!) inside the store. The one large pipe is cut down to four equal sized pieces. Then wash the oil off of the pipes (the employees at Lowe’s put oil on there to help cut it) and once dry, rough them up a little bit with sandpaper so the paint will adhere and spray paint all the parts using a flat black color.
Now the wood shelves. Literally any type/size of wood will work but use a thicker piece of wood for a look similar to their design. In their case,they bought one long piece and cut them to size (the hardware store will do this FOR FREE if you don’t want to handle this step at home). Then stain the shelves.
After the stain and the spray paint on the pipes dries, we’re ready to start hanging!
They used four anchors for each floor flange and then inserted dark screws so that the screws would camouflage with the dark paint. After each of the flanges is secured to the wall, screw in the pipe, then screw on the caps, and place the shelf on top of the pipes.
This next step isn’t mandatory, but it is high recommended. Secure the pipes to your shelf by securing them with the straps. The girls screwed them in using dark nuts and washers to make them EXTRA secure, and add a little extra flair.
What do you think? Do you love the style as much as we do? Let us know in the comments below! Don’t forget, if you decide to give this super simple DIY a try, send us pics! We want to see what you’re up to. taylor@norcalhomesllc.com