#DIY Ikea Hacks
#DIYThursday
Custom Furniture at Ikea Prices:
Designed by You, Built by You!
Them: “I love your bookshelf!”
Me: “Thank you, it’s imported from Europe.”
My Boyfriend: “… It’s from Ikea.”
He may have stolen my thunder, but only temporarily because I’m taking charge! He may not be impressed with my Ikea bookshelf, but after this Industrial-inspired DIY, he will be.
I don’t know about you, but I love a good Ikea find. They’re often affordable and it (usually) holds up pretty well. Over the years I’ve collected quite the cache of bookshelves, tables and desks from the Swedish furniture mecca but unfortunately, it doesn’t match the style I’m going for in my new home.
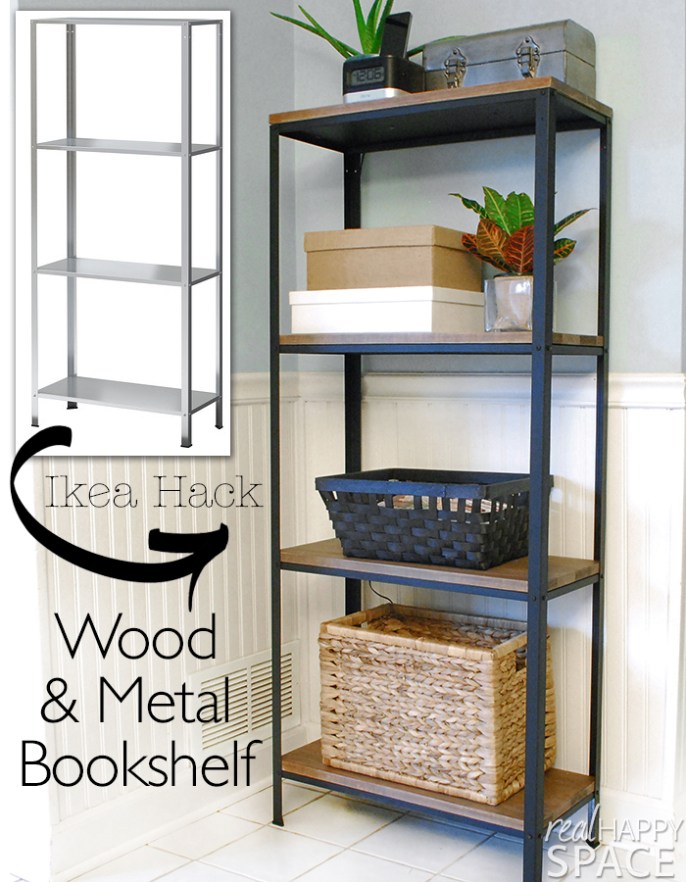
This is where my journey began. I’ve been on the hunt for tutorials and #DIY hacks to revamp my existing furniture. It didn’t take long before I found this bad boy and instantly fell in love! Not only is it super simple, the finished product is very on-trend. You can find pieces similar to this at just about every major retailer, from Target to Restoration Hardware and you’re going to pay anywhere from $135 to $1500+. But not today!
You can pick up this shelf from Ikea (in-store or online) for… $14.99!! When all is said and done, the original blogger said she spent about $50 once she purchased the necessary paint and wood. In all honestly, I think you can do it even cheaper than that.
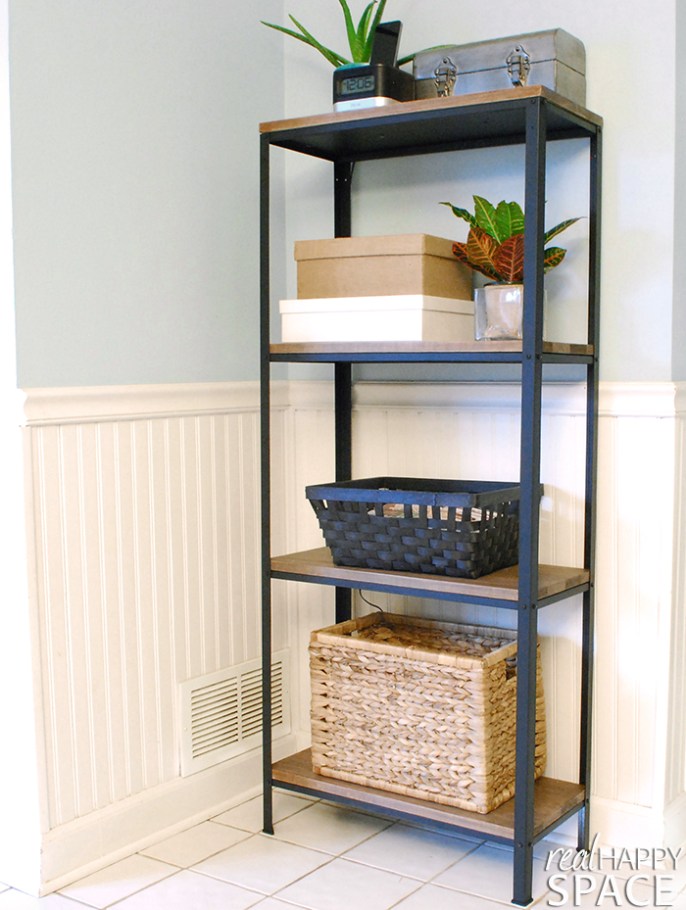
I won’t blab any longer… Here it is!
If you want to read the original article, click the link to head over to Real Happy Space.
Ikea Hack: Wood and Metal Bookshelf
Step One: Spray paint.
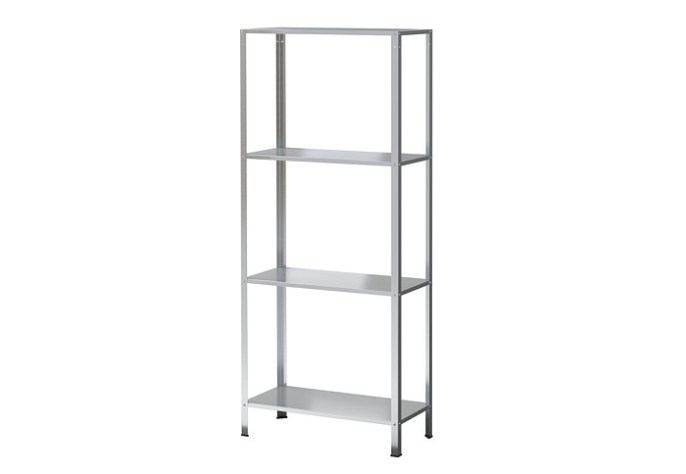
This one is pretty self explanatory. After assembling the unit, Spray it matte black and let it dry for several days.
Step Two: Cut and Stain Wood.
Use 1 by 12 wood planks (I used aspen). Cut the boards to the correct lengths. 23 9/16″ for the bottom three shelves and 23 10/16″ for the top shelf. Then rip the boards to the correct depth. 10 5/8″ for the bottom three and 10 13/16″ for the top shelf. Stain and poly them your desired color.
Step Three: Attach Wood.
With the metal shelves completely assembled, loosen the screws slightly for the bottom three shelves, then simply set the shelves in place and tighten the screws. They should be nice and snug.
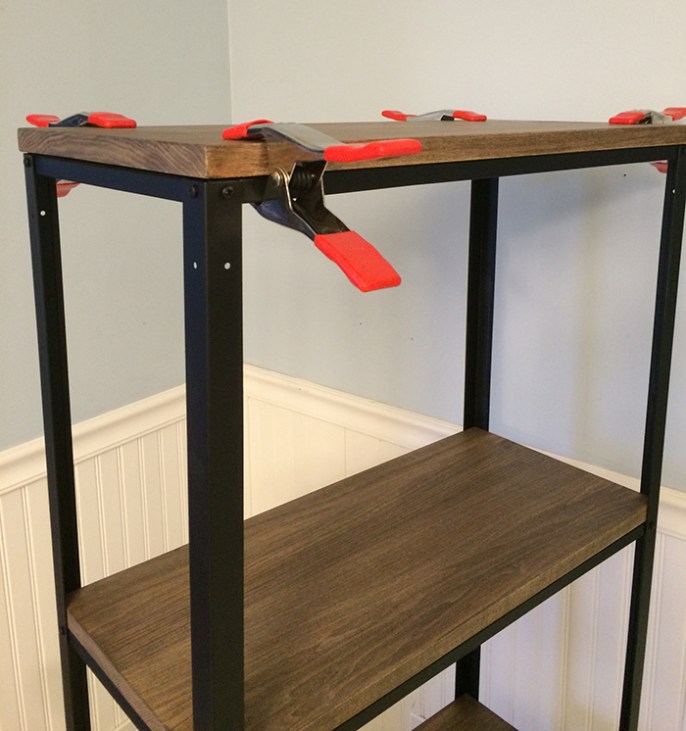
To attach the top shelf, place the wood on top of the metal shelf and align it. Use clamps to secure it. Unscrew the shelf, flip it upside down and place it on a sturdy work surface. Use a drill to make at least four holes in the metal and secure the wood to the metal with screws (make sure your screws aren’t too long.
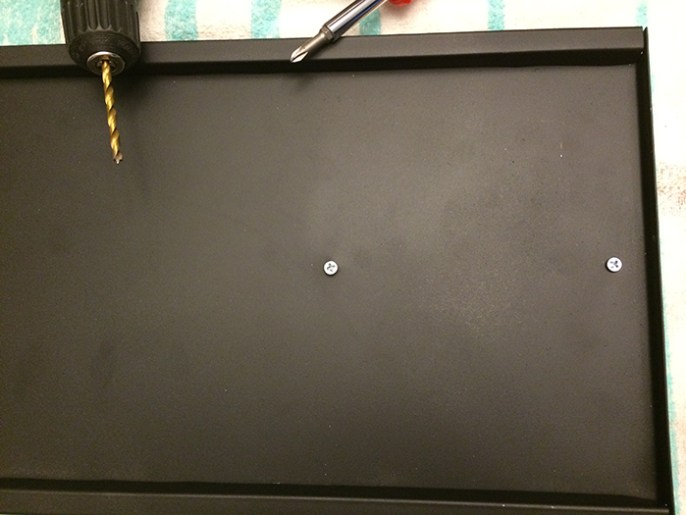
Add a touch of spray paint to camouflage the screws.
AND THAT’S IT!!! What do you think? Will you give it a try?
If you give this DIY a try, snap and pic and send it to me at Taylor@norcalhomesllc.com and we’ll share it on our Instagram! 🙂