DIY Vertical Garden
#DIYThursday
Little Space, Big Garden
As the days are getting longer and the weather is staying warm into the evenings, I’m finding myself spending a lot more time outside after work. Whether it’s hanging out by the pool, BBQing or just watering the yard, it’s kind of therapeutic to wind down outdoors after a long day.
I’ve been reading a lot about all of the amazing vegetables that grow during the summer months, and after looking at pictures of Kevan’s garden… I have some serious garden envy. My backyard is still under construction, so I can’t go full throttle with a gorgeous raised planter like Kevan did, so I decided to dig around (pun intended) a little online and for something a little less permanent, but still just as functional.
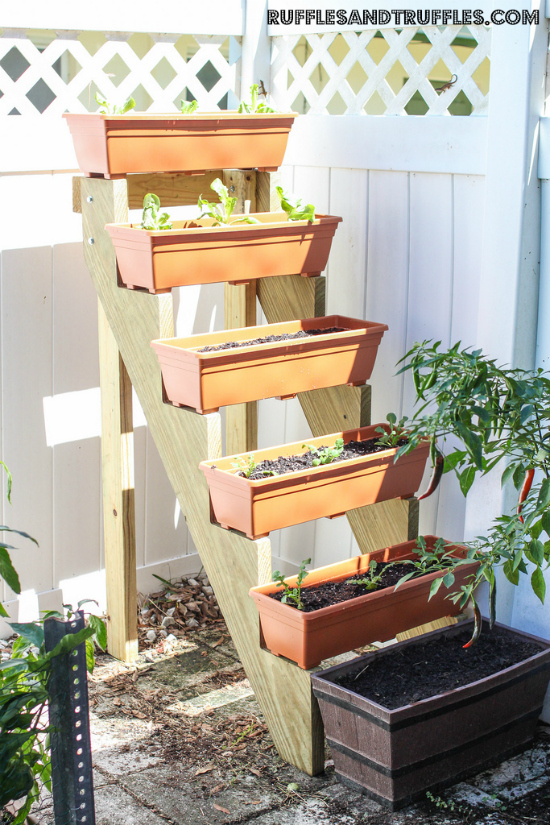
That’s when I found this bad boy: DIY Vertical Planter Garden
In the tutorial, they use standard resin boxes. When I build mine, I plan on finding something a little more rustic. However, for all intensive purposes the steps will be the same. If you decide to try out this awesome #DIY, I suggest you get creative, too! Maybe try staining or painting the stands or using a fun variety of planter boxes… whatever makes your garden grow! 😉
Below is the guide by Helpful Homemade. To check out the full, original article and see more step-by-step photos, click here.
DIY Vertical Planter Garden
You will need:
2 stair risers (we used risers with 5 steps, but you could also use a 4 or 3 stair riser as well)
5 planter boxes (we used 6″x24″ resin window boxes)
1 2″x4″x12′ board (pressure treated)
Drill
4 bolts (we used 3.5″ 5/16 hex bolts)
4 nuts (5/16)
8 washers (5/16)
20 screws and matching size washers
8 additional screws
Instructions:
1. Cut the 2×4 into three pieces – 2 legs and one board to stabilize the back/connect the risers. For our 5 step riser, the leg beams measured 50.5 inches each, and the back support measured 20.5 inches (the width of the bottom of the planter boxes). We had some wood left over. If you don’t want to bother measuring and cutting the boards at home, most home improvement stores have a cutting center you can use (we did!).
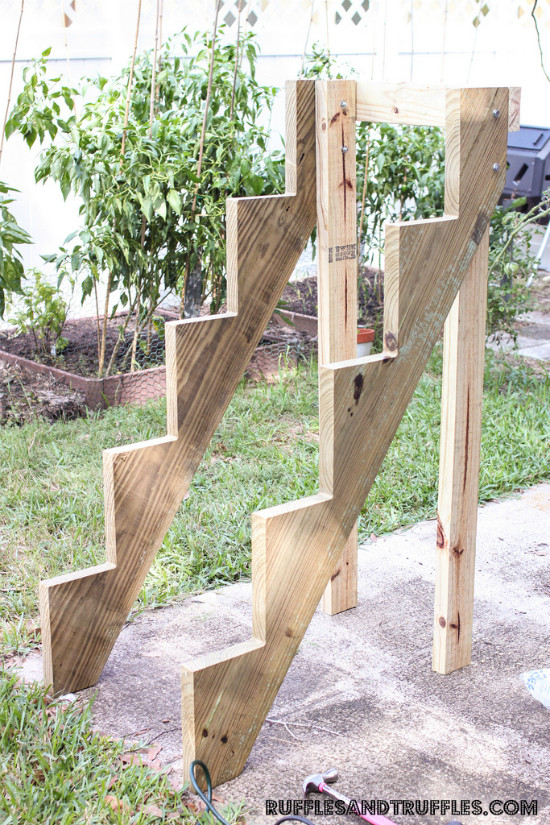
2. Drill two matching holes into both the leg and stair riser so they can be attached with bolts. Make sure the holes align – measure before drilling! Align the top of the leg with the top of the stair riser, and the back of the leg with the very back of the riser piece. Attach each leg to a stair riser with bolts; slide a washer to the end of the bolt, insert into the riser/leg, add another washer to the exposed end, and tighten a nut to finish. Repeat until all four bolts are attached. We placed the legs of our vertical planter on the inside of the structure, but you can also place them on the outside of the riser if preferred. However, if you choose this route, you will need to measure a longer piece for the back stabilizer to account for the added width of the structure.
3. At this point, each stair riser now has a leg attached. Stand the stairs upright; the next step is to attach the back stabilizer piece of 2×4. Align the stabilizer piece directly on the back edge of the structure. Drill screws directly in the back of the stabilizer piece and into the leg/stair pieces to connect them. This may require the assistance of a second person to hold the stabilizer/stairs/etc. in place. We used 8 screws; 4 on each side of the structure. Make sure the screws you select are long enough to drill through the stabilizer and into the stair risers/leg pieces.
***Note: before drilling the stabilizer piece into place, it is a good idea to place a planter box on the top step of the riser to make sure it is the correct width to hold it.***
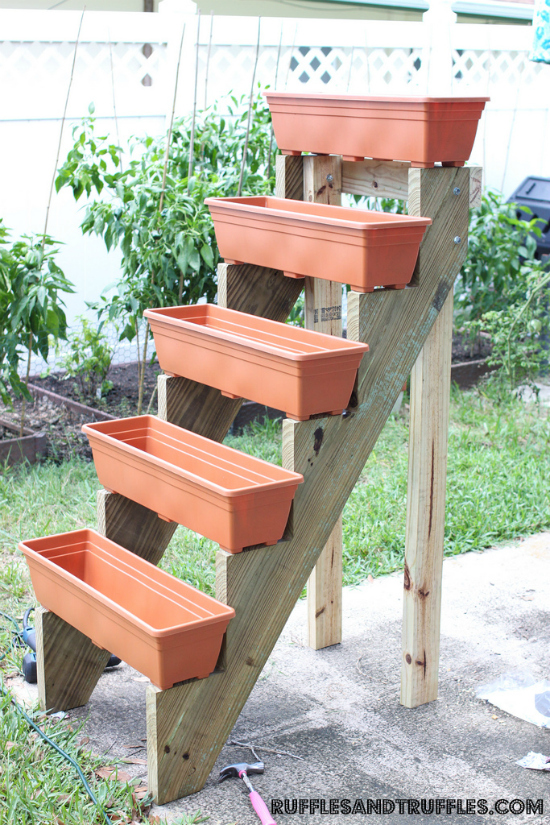
4. It is now time to attach the planter boxes. Place a washer on the end of 20 screws. Carefully hold a planter box in place on a stair riser and drill the screw/washer into the base of the step. We placed 4 screws in each planter box; we started from the bottom and worked our way up the structure.

5. When the planter boxes are attached, drill additional holes in the bottom of the boxes to allow them to drain well.
6. Fill each of the planter boxes with potting soil, plant seeds/seedlings, and watch them grow!