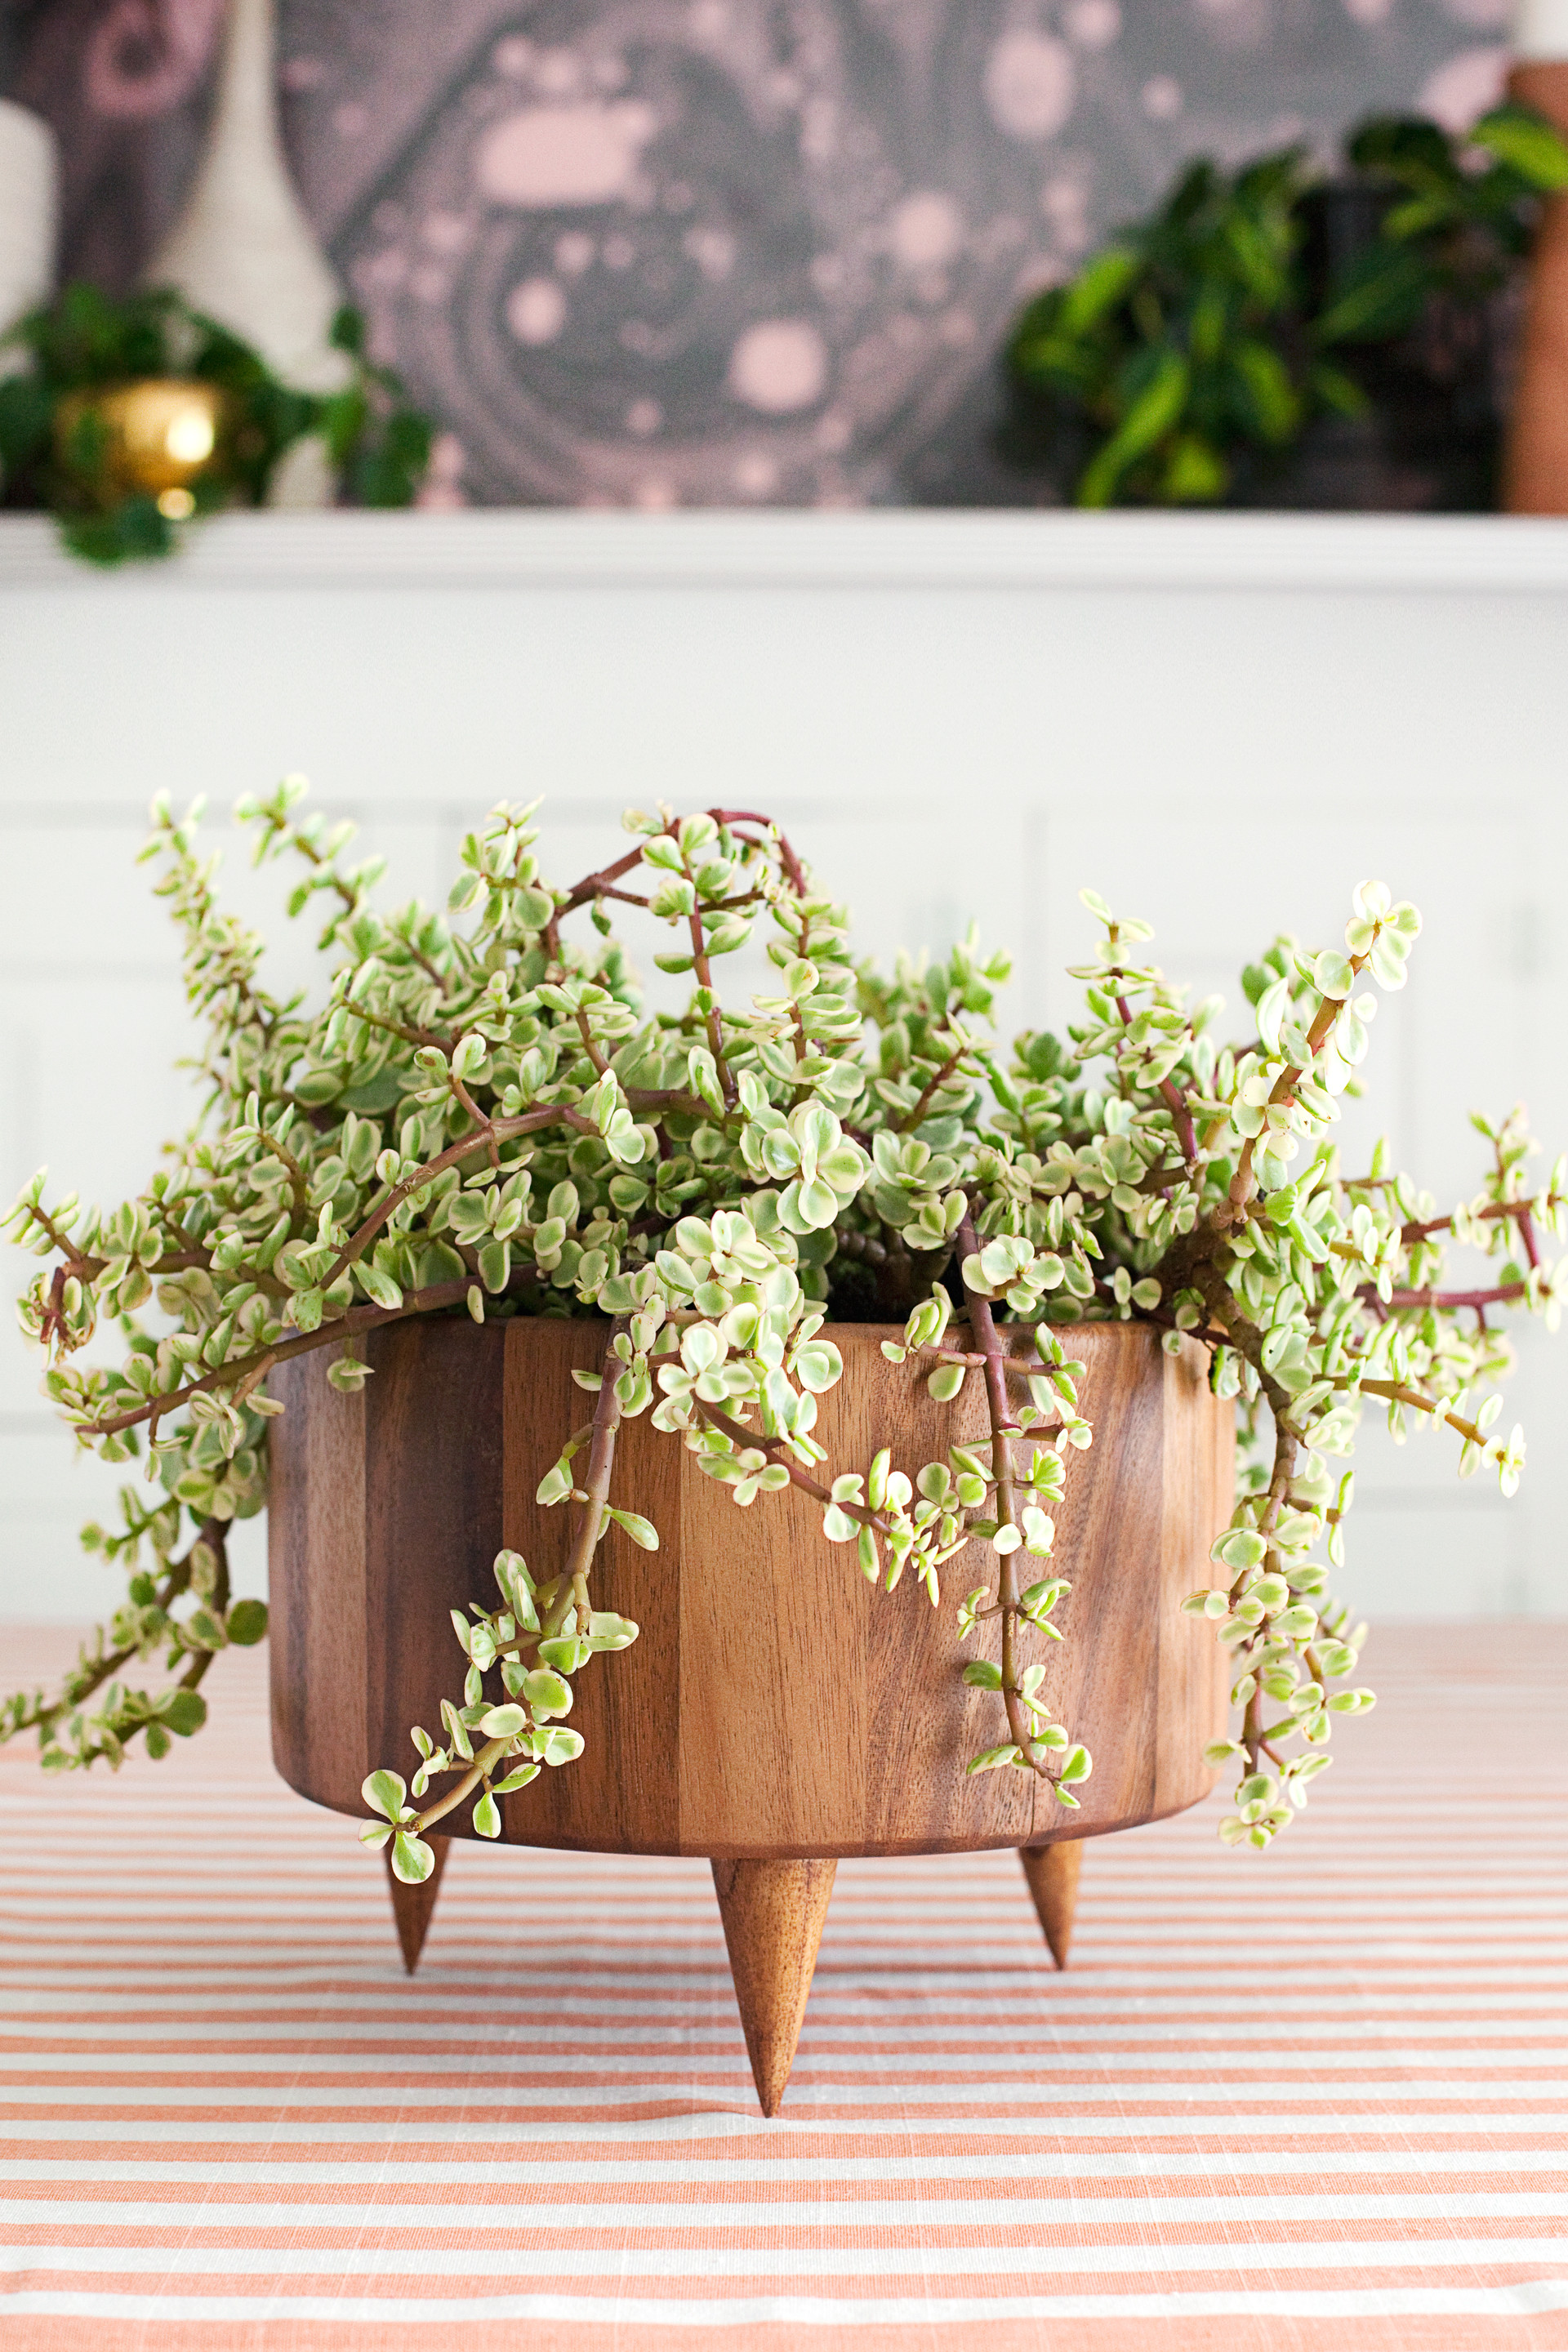
DIY Wooden Planter
#DIYThursday
DIY Planter So Easy, Even I Can Do It!
I’ve been on a HomeGoods kick lately.
Can I get an “Amen”?!
I have to admit, I’ve been going to different locations, trying to score new and unique product. One thing that keeps popping up at every location… beautiful wooden bowls.
They first caught my attention when we started prepping to talk about open kitchen shelving on our Instagram page. Looking at the various designs, it’s easy to imagine them displayed on a kitchen shelf, juxtaposed against a crisp and clean subway tile back splash.
That being said, my kitchen doesn’t have open shelving and I couldn’t really justify purchasing one of the bowls.
Until. Now.
When I saw this #DIY my first thought was… “DUH!” Then I quickly started planning my next trip to HomeGoods!
A Beautiful Mess (which is a SUPER cute Blog and totally worth checking out) took a wooden bowl, stuck some legs to it and just like that she had a retro indoor planter. She got her bowl and pegs on Amazon. The bowl is perfect for sliding a less-glamorous planter in it, but the legs aren’t necessarily my style. The awesome thing about it is, you can choose any bowl and legs you want to! It’s completely customizable.
Check it out, and let us know what you think! 🙂
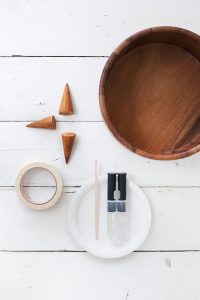
Supplies:-wooden bowl
-3 wooden ring display cones
–epoxy cement
–masking tape
-disposable surface (such as a paper plate or piece of cardboard) + disposable stir stick
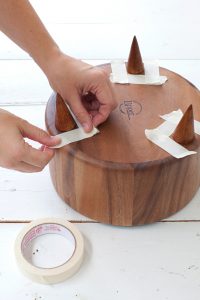
Step One: Situate the wooden cones equidistant on the edge of the bowl’s bottom. Mark their placement with masking tape. This will make it easy for you to perfectly place the cones during the next step when time is an issue.
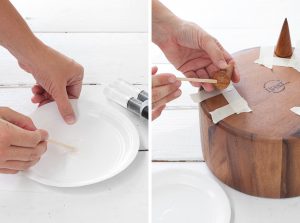
Step Two: Squeeze out an even amount of the two epoxy ingredients from the tube onto a disposable surface. Quickly mix them together with a disposable stir stick, then goop some epoxy onto the flat edge of the cones/feet. Spread the epoxy lightly and evenly, then press the feet into place on the bottom of the bowl. The epoxy will set up very quickly, so you don’t have much time to fuss here. Hence the taping from the previous step.
Make sure to immediately remove the masking tape, lest any of the epoxy set up over top of it!
Drainage Considerations
If your wood bowl is not already sealed, I definitely recommend lightly sanding and spraying down the bowl with polyurethane to make it waterproof. You may choose to drill drainage holes into the bottom of this planter, in which case I would recommend sealing the wood inside the holes with polyurethane as well. If you don’t, you risk rotting the wood as it becomes soaked with water.
I cut down the sides of a fancy plastic self-watering pot to fit inside this planter so the water could drain into the saucer inside of the wooden bowl. I bought two plastic pots to try out, and one ended up being the perfect size! Using this interior planter is great for the succulents I’m using and certainly is a lot easier than dealing with drainage holes in the wooden bowl itself. If you are planting something like pothos that doesn’t need soaking and ample drainage, I wouldn’t worry about drainage holes. Just don’t overwater it.